How to Draw A Bubble Letter B. The letter B is used a lot in our daily life. Some of the best items in life begin with a B; Beach, gum, and bacon would be a few examples to start with!
Also, check our unicorn coloring sheets.
As you work through this guide, think of more words that start with B so you can come up with them later.
Since it’s the second letter of the alphabet, you likely already know how to compose this letter. While that may be the point, you might need help understanding how to draw a bubble letter B, and that’s why we’re here!
How to Draw A Bubble Letter B
Step 1
When you write a word, you generally start from left to right. The same goes for this letter since we start on the left side of the letter.
This first step is excellent and comfortable, as you only need to draw a single curved line. This letter design should look like a bubble inflating outward, then gently curve the line outward.
You can look near our connection picture and recreate it yourself. Draw well and slowly, and there is no rush.
You can also make drawing easier by drawing rough instructions. To do this, draw a capital B with a light-colored pencil.
You can then tauten the bubble version of the letter near this guide and erase those guides when you’ve drawn the final outlines.
If you’re going too fast, the line may need to be smoother, so slow and steady is the best way to do this. Once that first row is complete, we can move on to step 2!
Step 2
To continue this letter, we’ll extend the line from step one to draw the beginning of the letter. This second line extends straight from the top of the first line.
As you can see in the reference image, this next part tilts up slightly before gently sloping back down. Think of it like a roller coaster suddenly falling.
As you draw, ensure this second line ends where it is in our reference image, as we’ll add more later.
Again, it would help if you took it slow. Although the line is simple, it can get slightly uneven if you try to rush it.
That’s it for now, so let’s move on to the next section as we move on to step 3!
Step 3
In step 3, we’ll complete the outline of your bubble with the letter A. This step is the most you’ve drawn at once so far, but you definitely can!
First, extend the line where you stopped. This curves to form the lower bubble of the Bb.
As you can see, this curves outward and then inward. It can be more complicated than it looks, so follow the instructions carefully.
This brings you back to where it all started: the left “spine” of the B. Where the bottom bubble of the B connects to the spine, we’ll add a smaller curved line.
Once everything is connected, your design is complete, and we can start adding the internal details to your letter.
Step 4
You can now start drawing the inside of the letter. As shown in our reference image, this starts with two simple circles.
If you’ve ever tried to draw a perfect circle, you know it’s almost impossible to do it freehand!
Fortunately, there are a few ways to circumvent this obstacle. One would be to use a drawing tool to help you draw the circles.
It is best to use a drawing compass, but you can also use stencils. If all else fails, try to find two flat objects to drive around with.
Another way to overcome drawing two perfect circles would be to make them imperfect. You can make the lines of the circle’s outline a little wavier.
This could also make the letter look more like a bubble! However, you end up drawing these two circles. Once they’re there, we can add the finishing touches.
Step 5
Your bubble is technically drawn with the letter B, but we have some final touches to make it even better. Our goal in this fifth step is to make the letter look like a real bubble.
Bubbles have depth and reflective surfaces; we’ll try to recreate that look here.
To do this, start by drawing some small oval shapes on the B. You can place them in the same places as our example or elsewhere.
We recommend placing only a few of these ovals as they can spoil the effect.
Once these are drawn, let’s add some simple curved lines to the inside edge of the B. Again, you can add more if you like!
These curved lines add depth to the letter and make it look like a real bubble. With these details, you’re ready to add some color!
Before you do this, make sure to add any additional details you might like, such as B. Pattern or texture details to make it even more unique.
Step 6
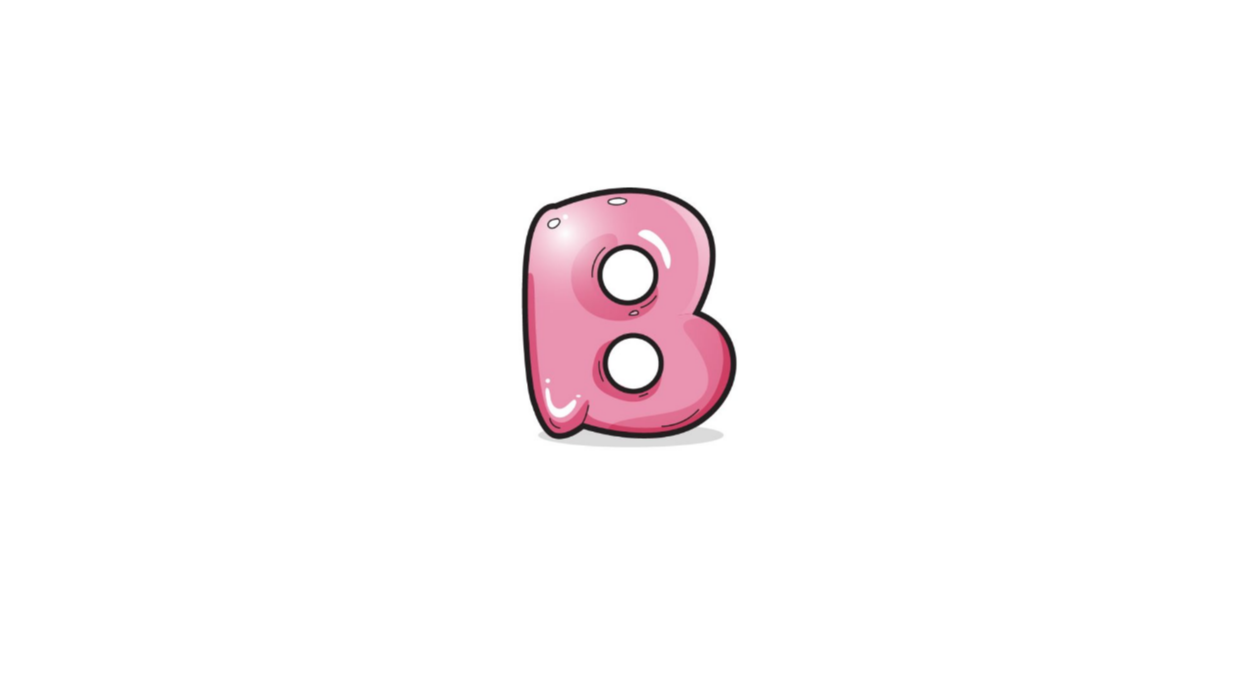
Now that your letter B bubble is complete, it’s time for some coloring fun. In our example, we only showed you one color scheme.
We went with various shades of pink to make this letter look like a bubblegum bubble! When adding colors, you ideally want to include light and dark tones in the color scheme.
If you stick to just one shade, you risk making the drawing look flat. Using different shades helps add some depth to the bubble.
The pink color scheme looks great, but don’t feel limited to sticking with what we’ve picked!
Instead, you can use any other color combination for your design. Once you’ve drawn patterns or texture details, you can add more color to your drawing.
Using different colors is one way to enhance their look, but you can also use different art tools, mediums, and techniques to add even more variety to the colors.
Your Bubble Drawing is Finished!


